How to Export Google Tour Creator Projects into VRTY
As you may know that by next month in June 2021, Google Tour Creator and many of the poly creator tools are shutting down. I’m sure that users who still want to use Virtual Reality (VR) and 360° imagery platforms are looking for alternatives out there. The VRTY platform provides all the functionality and more as compared to Google Tour Creator! Read some of our main features! You can export your Google Tour Creator projects and upload them into VRTY. You won’t have to lose any of the VR/360-degree projects that you had created!
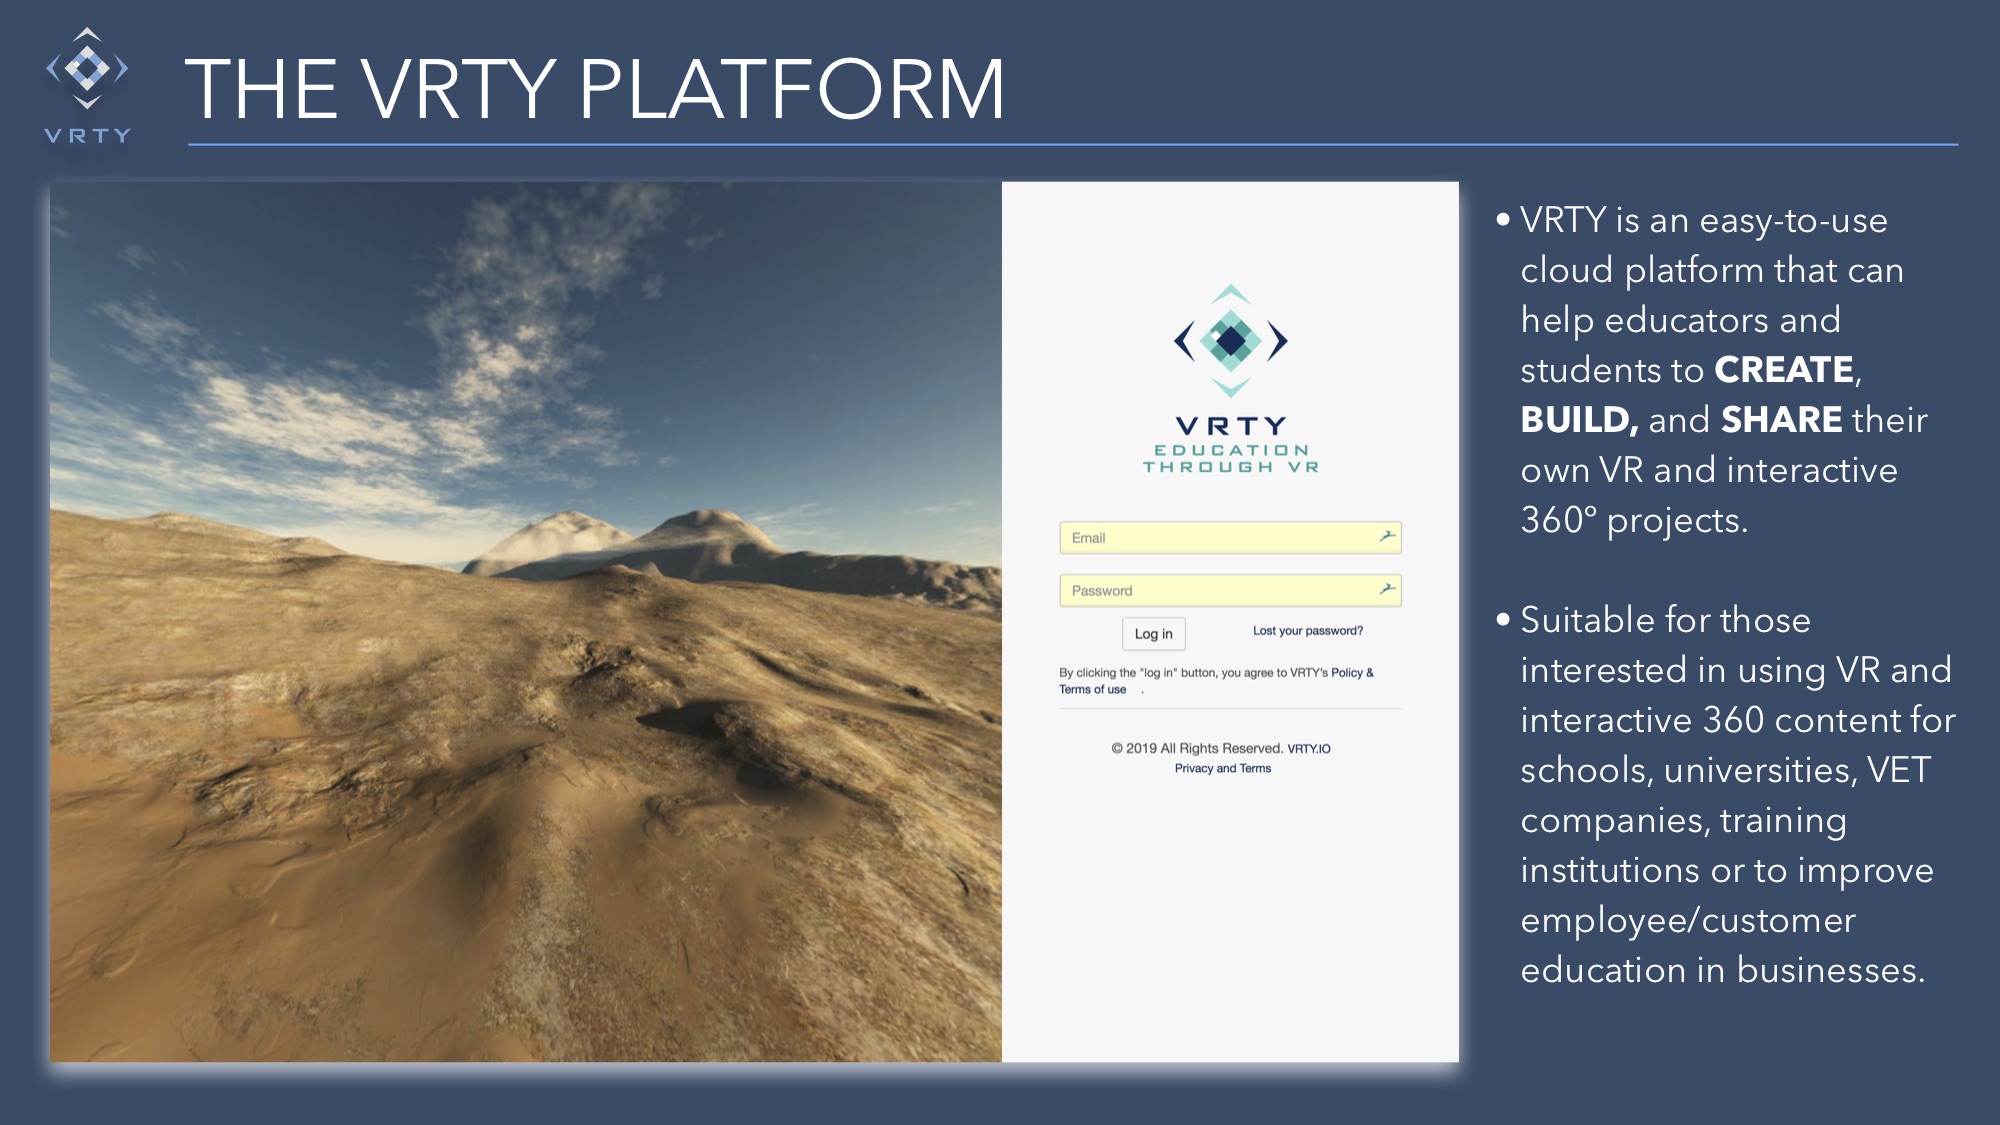
What is VRTY?
VRTY is an easy-to-use cloud platform that allows you, the creator to build and share your own virtual reality and interactive 360° projects. The platform is beyond just a Google Tour Creator replacement. You can do so much more! Have a read on the list of our main features right here. In VRTY, you can upload images, videos, 360° images and videos, animated GIFs, audio for a high-level interaction. VRTY also has an additional feature that is useful for the classroom which is called the CoLab. Additionally, we provide a step-by-step guide with videos, resources, and inspiring projects to help you deliver the cutting-edge program in the market as quickly and easily as possible.
How to Export your Google Tour Creators
Click on the ‘download your library’ in the red banner above your VR project in the Google Tour Creators. From there it will bring you to another page to start your exporting process.
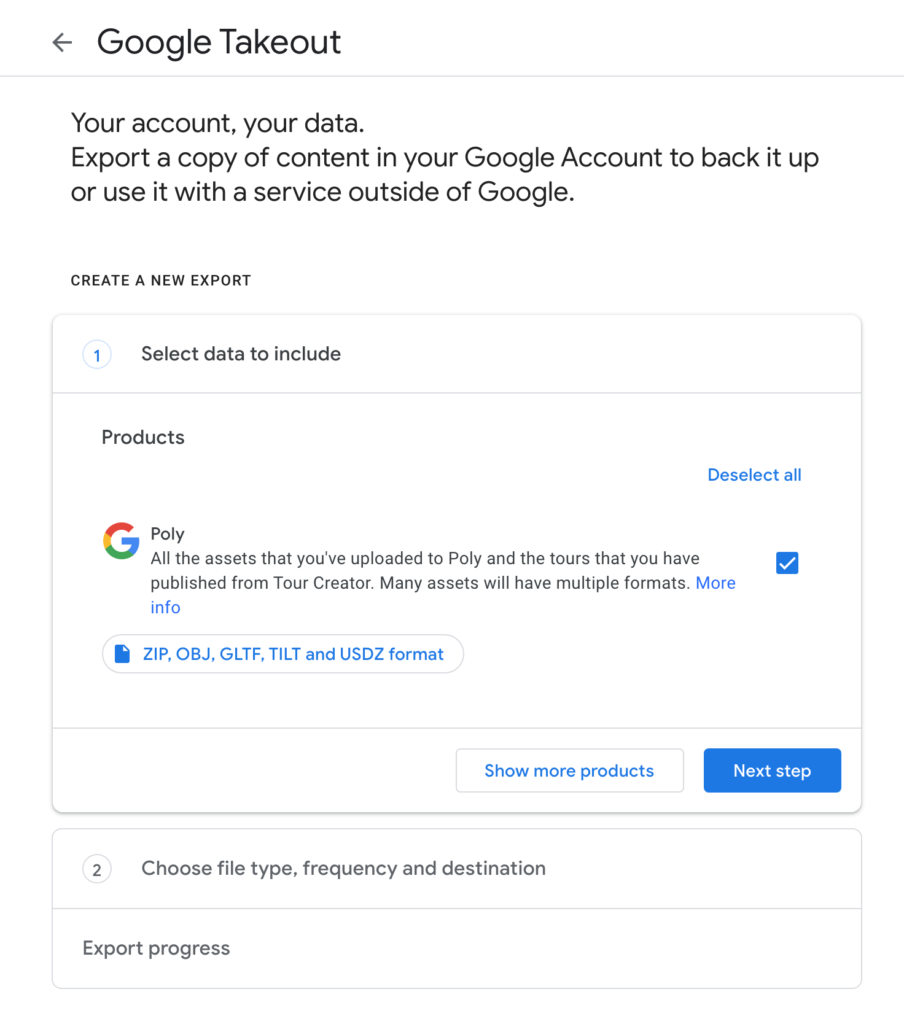
First of all, you will be redirect to Google Takeout, which is where you can export and download your projects from any of the Google platforms. Click on Poly as Google Tour Creator is part of it.
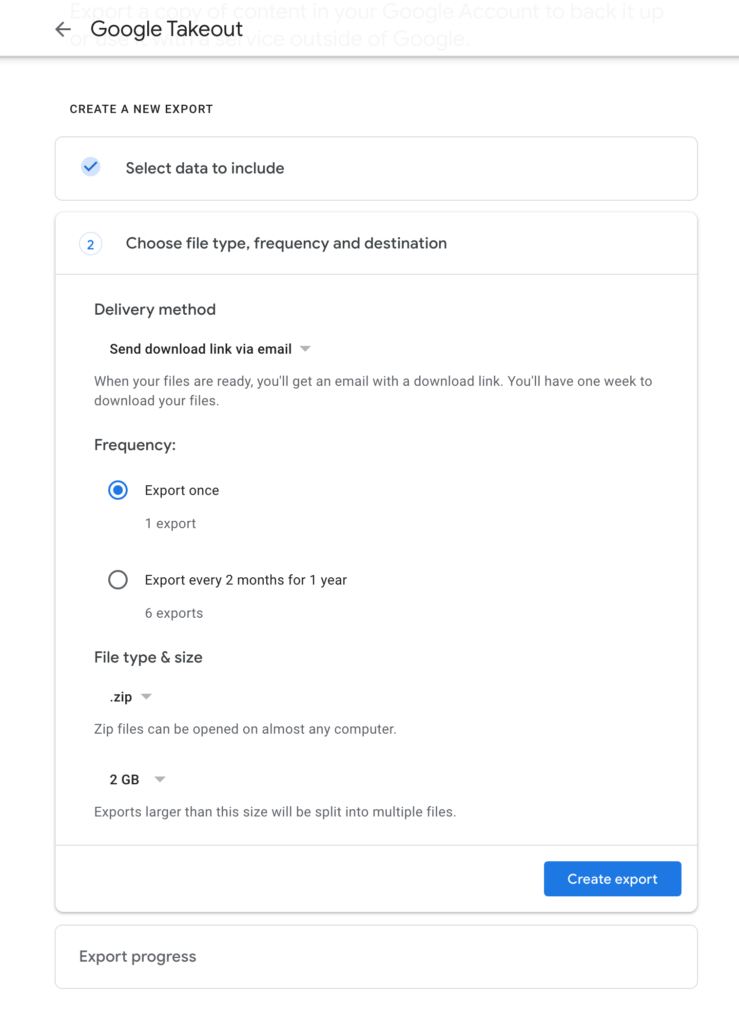
For the next step, you can choose the frequency and the file type and size to export the project. To upload into the VRTY platform, we recommend you download a zip file type.
Your project will be exported into a zip file and ready for you to download.
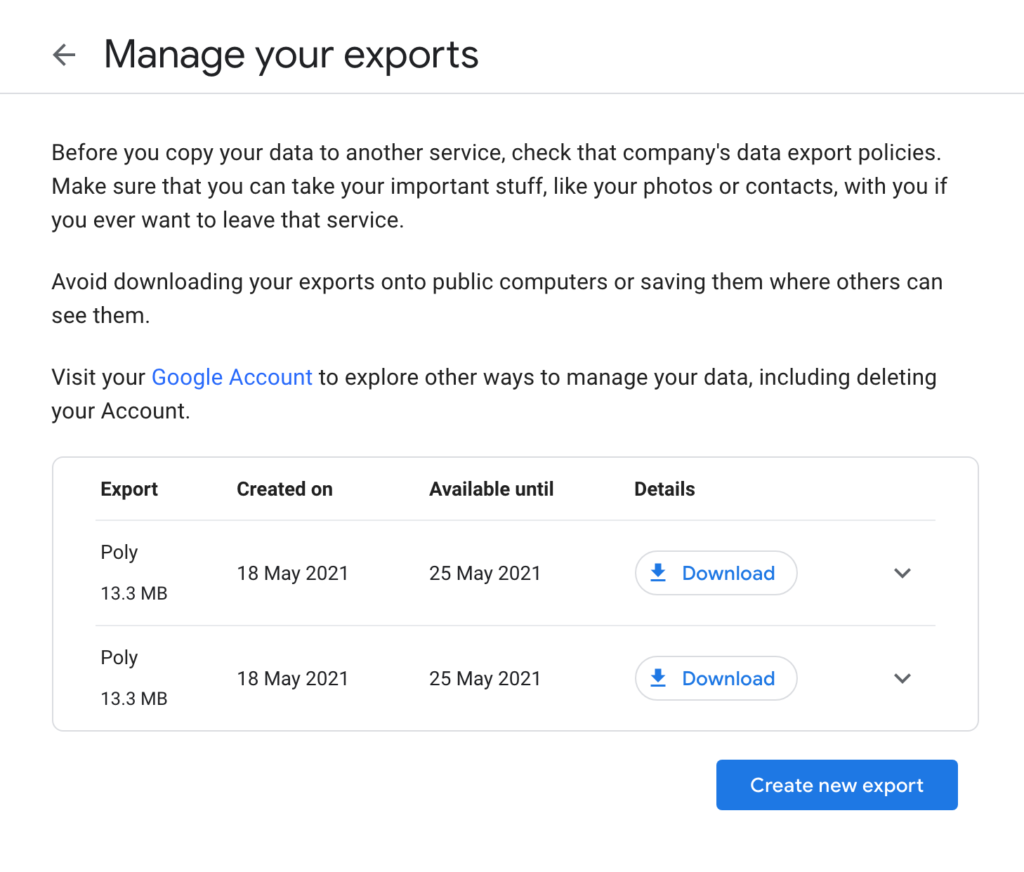
Lastly, you can see the list of zip files that is ready for you to download. Each file is only available to download for about one week, so make sure that you download them within the available period.
How to import your zip file into VRTY
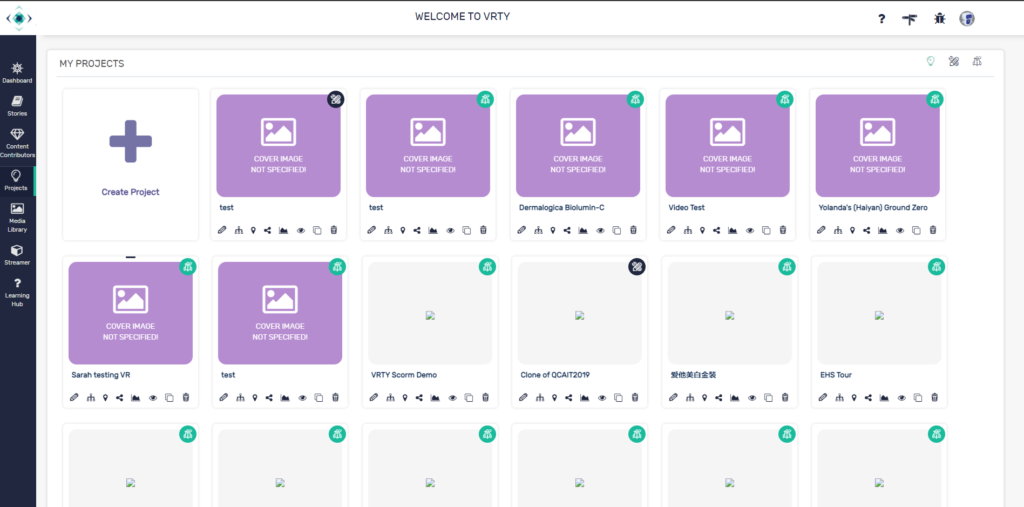
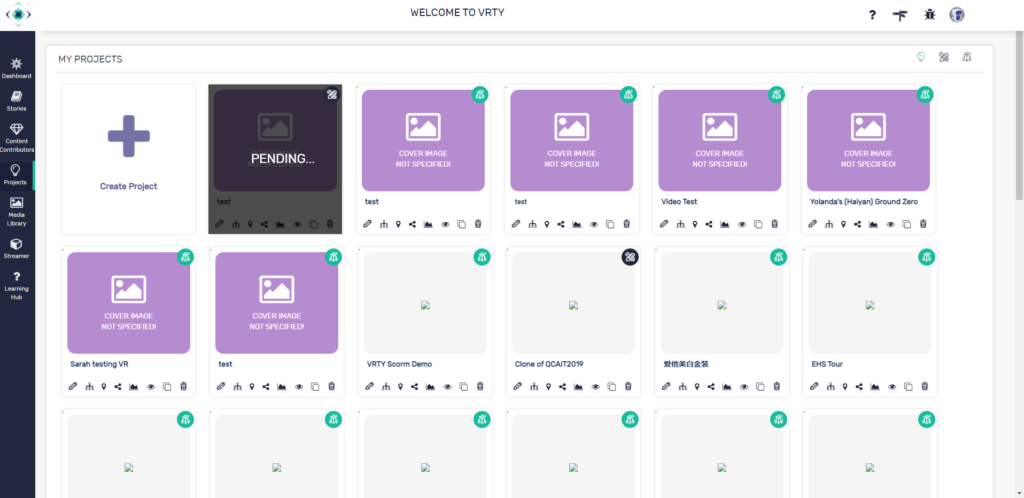
Login to your VRTY account. If you don’t have one, just sign up for a trial! Click on the ‘projects’ button on the menu on the left-hand side of the screen. Then click on ‘create project’, just like how you would create a new project.
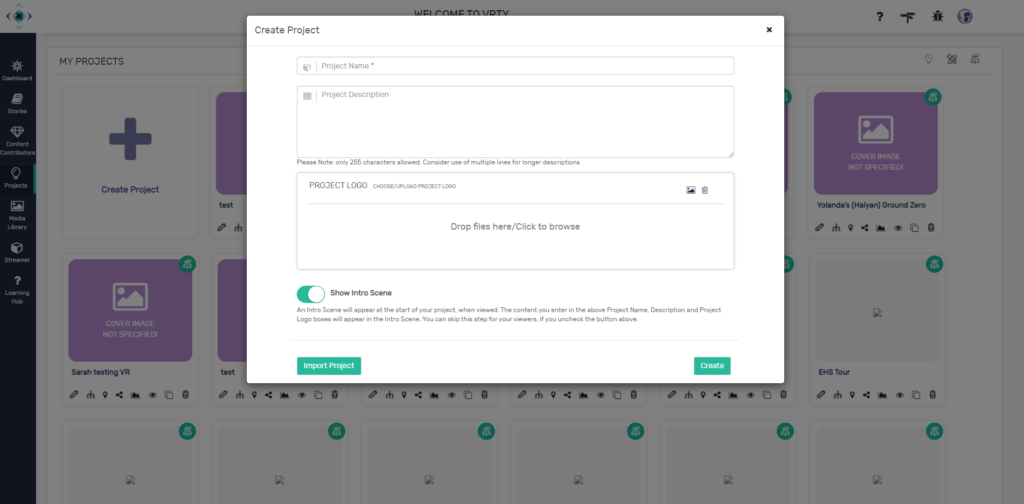
Click on the ‘import project’ button at the bottom left corner in the pop-up box.
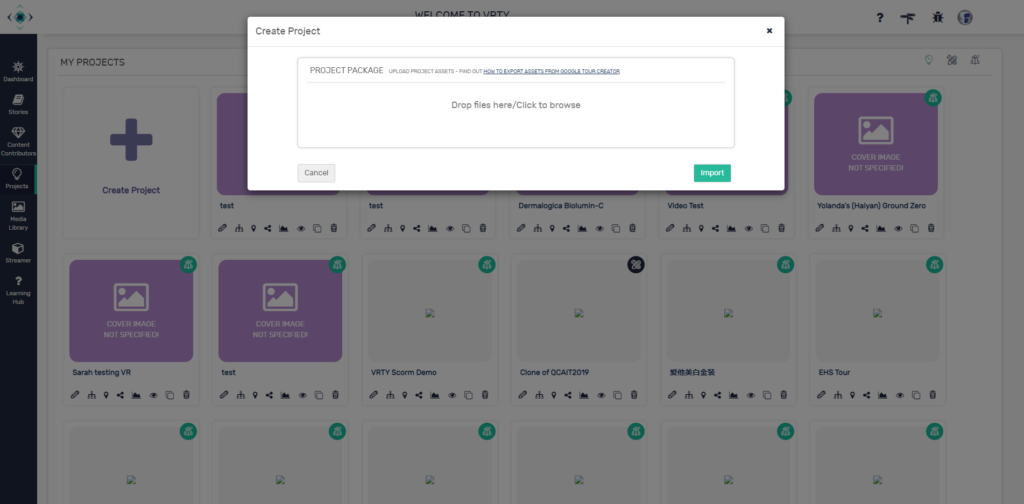
You can upload your recent exported zip file from Google Tour Creators into the box. Alternatively, you can click on the box and browse the zip file in your local folders. Please upload one project at a time. Click on the import button when you are ready.
Then, a new project will load up in your project list. It will state that it is in pending status as it is being uploaded. Give it a few minutes and your project will be uploaded completely and ready to use again. You can add on, make changes and view the VR project as per normal like any of the VRTY projects.
Creating Student Accounts Using the Student Menu Option
The other way to create Student accounts is as follows:
Log into your account.
Select [Students] from the menu bar on the left-hand side of the screen.
If you’d like to add Students into Teams, Classes or DIVISIONS, click on the [New Division] button. A pop-up box will appear so you can label the group and add any notes. Click the [Save] button once finished.
You can also add SUB-DIVISIONS under a DIVISION, by clicking on the [New Sub-Division] menu option on the right-hand side of the screen. For example: You can set-up a Year 9 Division with further Sub-Divisions of Year 9 English and Year 9 Italian.
To manually add Students, first select the Division or Sub-Division that you would like to add Student accounts to. It should be highlighted with a Blue background if done correctly.
Then click on the [Create New Student] icon (the person icon with a + symbol). A pop-up box will appear where you can type in your Student’s name and email address. You can also choose to ACTIVATE the account straightaway, by selecting it from the [Current Status] dropdown menu. Click [Save] once finished.
This will create a new Student account on the VRTY Platform and add their name to your Student List.
An email will be sent to the Student’s email with their login details and password. They can use these credentials to login to the VRTY Platform and start creating. We strongly recommend for the Students to change their password to their own unique password.
Repeat Steps 5 and 6 to add more Student accounts.
Locked-down Student Emails
In some instances, Students are not allowed to receive emails from external email addresses. In this instance, you can create the Student accounts manually, as above, and then preset a password for them so they can login to the VRTY Platform. The process is as follows:
Follow Steps 1 through to Step 7 as outlined above.
Since the Students cannot receive an email from the VRTY Platform, the automated email will not work.
Go to your Student List and select the Students that you would like to manually preset a password for. You can do this by clicking the box to the left of their name, or the box at the top of the list to select them all.
The MANAGE PASSWORDS FOR SELECTED ACCOUNTS button should now be highlighted in Red. Click on this button. A pop-up box will appear with options to type in a specific password. You’ll need to type in the password again to confirm. Once you have finished, click [Save].
This will now preset your password on the VRTY Platform for these selected Student accounts.
The Students can now login to the VRTY Platform using their email addresses and the preset password. We strongly recommend for the Students to change their password to their own unique password once they have logged in.
If you need any further assistance, please contact your VRTY account manager.
Creating Student Accounts Using the Admin Menu Option
When logged into the VRTY Platform as the Admin, there are 2 different ways to create a Student User account.
1. SELF-REGISTRATION
The self-registration account process can be used when creating many Student accounts at the same time. The process is handled by a weblink which is shared with your Students. From the link they can register and complete the User Account set-up process by themselves. Below is the process:
Log into your account.
Please note that your profile name (at the top right-hand corner) states that you are the ‘Admin’ for your school/organisation.
*If is not stated as the ‘Admin’, please contact your VRTY account manager asap.
Select [Admin] from the menu bar on the left-hand side of the screen.
Under the MANAGE USERS section, select [Student] from the drop down option. This will set the page options to managing Student accounts.
Under the ENABLE REGISTRATION LINK FOR STUDENTS, select the [Enable] button on the top right-hand side of the screen. This action will enable a registration link to appear in this section.
Copy the registration URL link and share it (eg: via email) with the Students you’d like to invite to set-up an account on the VRTY Platform.
Once received, the Students can click on the link. It will open up an internet browser page for the Students to fill in the VRTY new user form with their details and submit it to VRTY.
VRTY will then notify you, the Admin, via email that a new Student account has been created and needs approval and activation.
As the Admin, you have two options to complete and activate their registration process:
Click on the [Proceed] button in each of the notification emails.
OR
Go back into the [Admin] section on the VRTY Platform, where you’ll see the names of the Students who have completed their registration forms. You can see their account Status as PENDING. Select the small [Tick] icon in [Action] bar to approve the request. The status of the applicant’s account will change from PENDING to ACTIVE.
VRTY will then send a confirmation email with a randomly generated login password to the newly created user account’s email. They can then activate the account via the activation link through the email and start their journey with VRTY platform. It is strongly recommended that the Student changes their password to their own unique password.
2. MANUAL ACCOUNT SET-UP
You can create and manage each account individually. Below is the process:
Log into your account.
Please note that your profile name (at the top right-hand corner) states that you are the ‘Admin’ for your school/organisation.
*If is not stated as the ‘Admin’, please contact your VRTY account manager asap.
Select [Admin] from the menu bar on the left-hand side of the screen.
Under the MANAGE USERS section, select [Student] from the drop down option. This will set the page options to managing Student accounts.
Under the MANAGE STUDENTS section, you will see the names and details of the Student accounts in your organisation. To manually add a Student account, select the [Add Student] button on the right-hand side of the screen.
A pop-up box will appear, where you can fill in your Student’s (name & email). Then click [Save] to create and save the account.
VRTY will send a confirmation email with a login password to the newly created user account’s email. The Student can activate the account via the activation link in the email and begin using the VRTY platform with their newly set-up account. It is strongly recommended that the Student changes their password to their own unique password.
If you have multiple Student accounts to set-up, please repeat Steps 4 and 5. To check on the process, all Student accounts for your organisation will appear in this section.
If you need any further assistance, please contact your VRTY account manager.
Now you have learnt how to create an account for teachers . It is simple to manage this account. Click here to read about it.
Creating Teacher Accounts
When logged into the VRTY Platform as the Admin, there are 2 different ways to create a Teacher User account.
1. SELF-REGISTRATION
The self-registration account process can be used when creating many Teacher accounts at the same time. The process is handled by a weblink which is shared with your Teachers/Builder. From the link, they can register and complete the User Account set-up process by themselves. Below is the process:
Log into your account.
Please note that you have the ‘Admin’ option on the menu bar on the left-hand side of the screen.
*If is not shown, please contact your VRTY account manager asap.
Select [Admin] from the menu bar on the left-hand side of the screen.
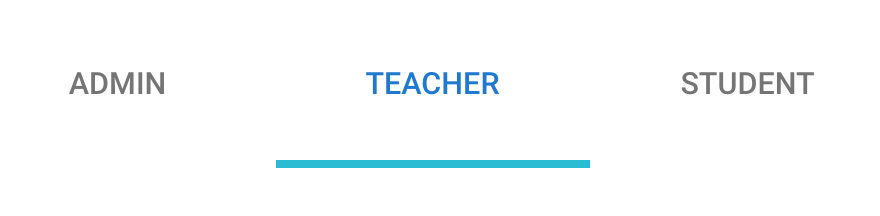
You will see a tab on top for ADMIN and TEACHER and STUDENT.
Select the TEACHER tab. This will set the page options for managing Teacher accounts.
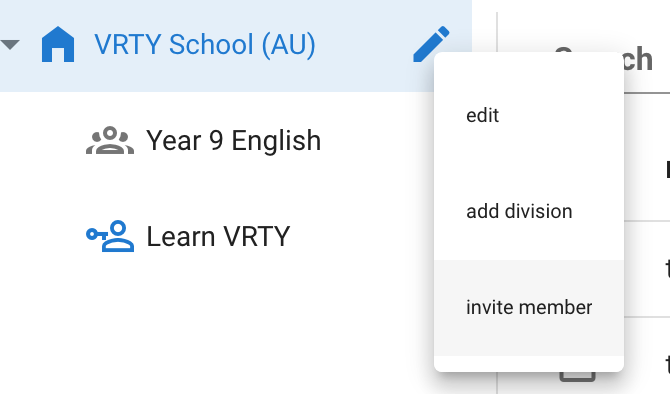
Click on the pencil icon .
Edit: Edit name of the organisation or class.
Add division: Act as classes to help the admin to organise the list of users.
Invite member: To generate a shareable registration link for your teachers.
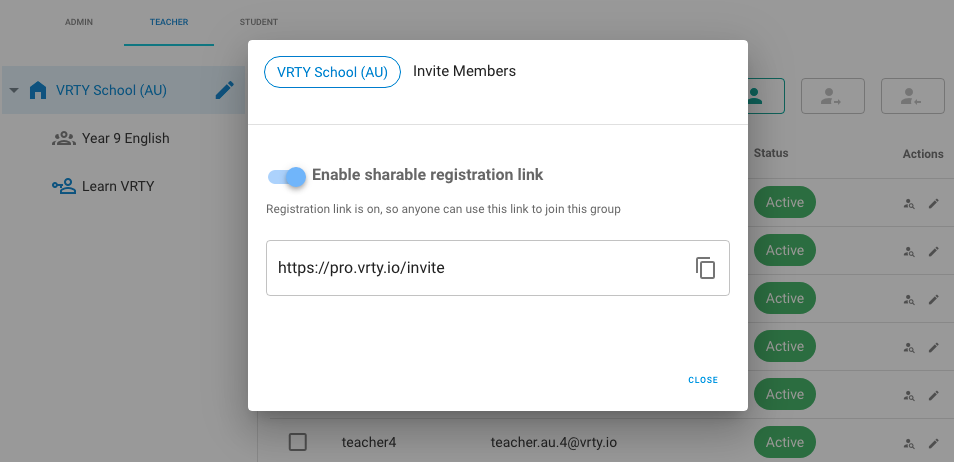
Select on [Invite Member] and a pop-up box will appear.
Toggle to turn on the ‘Enable Sharable Registration Link’, then a unique link will be generated.
Copy the registration URL link and share it (eg: via email) with the teachers you’d like to invite to set up an account on the VRTY Platform.
Once received, the Teachers can click on the link. It will open up an internet browser page for the Teachers to fill in the VRTY new user form with their details and submit it to VRTY.
VRTY will then notify you, the Admin, via email that a new Teacher account has been created and needs approval and activation.
As the Admin, you have two options to complete and activate their registration process:
Click on the [Proceed] button in each of the notification emails.
OR
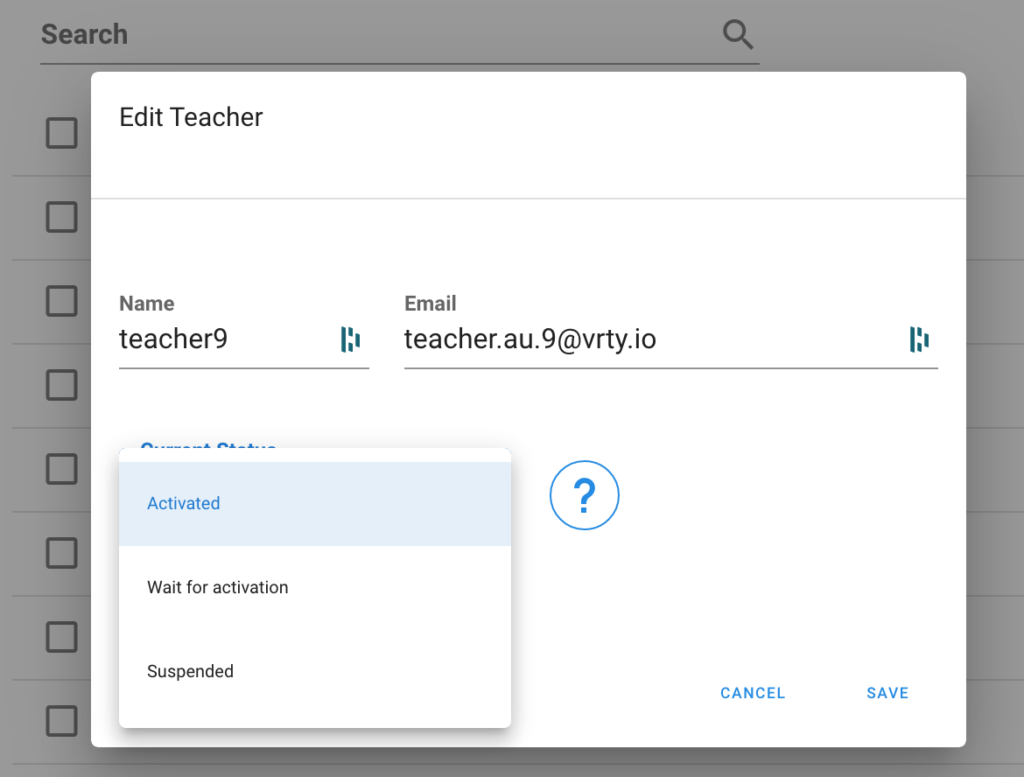
Go back into the [Admin] section on the VRTY Platform, where you’ll see the names of the Teachers who have completed their registration forms. You can see their account Status as WAITING FOR ACTIVATION. Select the pencil icon to change the current status to ACTIVATED. The status of the applicant’s account will be updated.
VRTY will then send a confirmation email with a randomly generated login password to the newly created user account’s email. They can then activate the account via the activation link through the email and start their journey with VRTY platform. It is strongly recommended that the Teacher changes their password to their own unique password.
2. MANUAL ACCOUNT SET-UP
You can create and manage each account individually. Below is the process:
Log into your account.
Please note that you have the ‘Admin’ option on the menu bar on the left-hand side of the screen.
*If is not shown, please contact your VRTY account manager asap.
Select [Admin] from the menu bar on the left-hand side of the screen.
You will see a tab on top for ADMIN and TEACHER and STUDENT.
Select the TEACHER tab. This will set the page options for managing Teacher accounts.
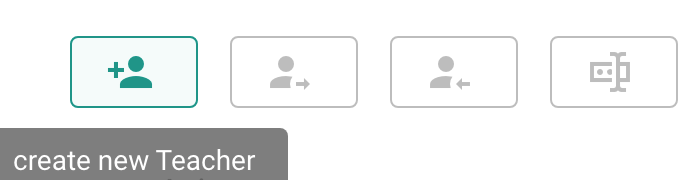
Under the TEACHER section, you will see the names and details of the teacher accounts in your organisation. To manually add a Teacher account, select the [Add Teacher] button on the right-hand side of the screen.
A pop-up box will appear, where you can fill in your Teacher’s (name & email) and set the current status of the account. Click [Save] to create and save the account.
VRTY will send a confirmation email with a login password to the newly created user account’s email. The Teacher can activate the account via the activation link in the email and begin using the VRTY platform with their newly set-up account. It is strongly recommended that the Teacher changes their password to their own unique password.
If you have multiple Teacher accounts to set up, please repeat Steps 4 and 5. To check on the process, all Teacher accounts for your organisation will appear in this section.
If you need any further assistance, please contact your VRTY account manager.
Now you have learnt how to create an account for teachers . It is simple to manage this account. Click here to read about it.
Creating a VRTY Project
The VRTY platform has been designed to make it as easy as possible for anyone creates their own interactive and immersive projects, which can be viewed in virtual reality and in 360-mode when published.
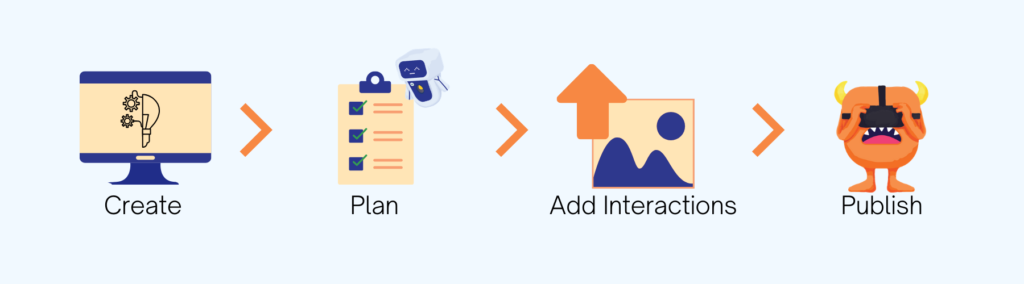
When you click on the Create Project section of the menu, you’ll be guided through a 4-step process taking you from starting to publishing. These 4 steps cover:
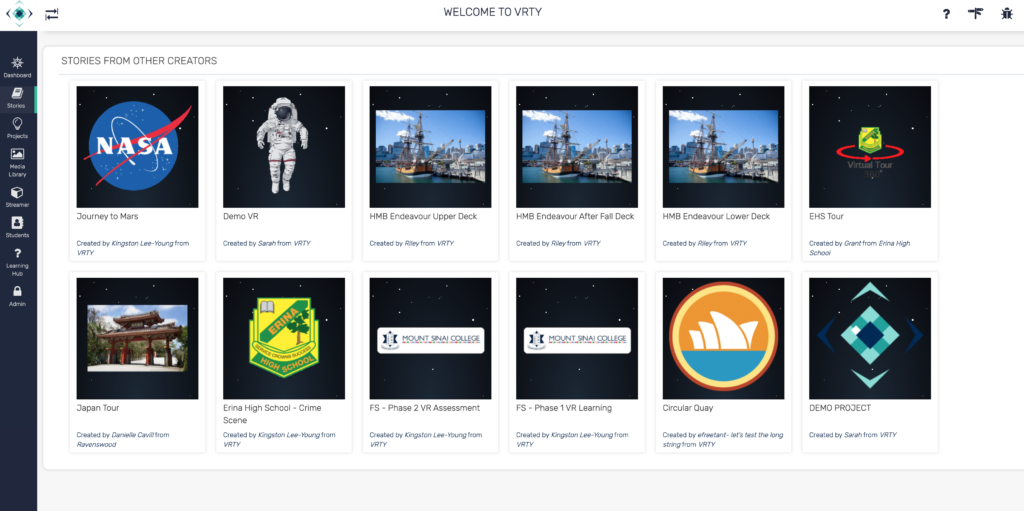
The ‘Stories’ section is where we showcase projects from our VRTY Community. You’ll see a variety of different projects from different creators, which you can click on and experience. The intent is to give you some ideas, examples and inspiration to help you when creating your next VRTY project.
Keep an eye out for more projects in this section, as we add more projects from our VRTY Community. If you would like to contribute your project to the Stories section, please contact us at [email protected]
How to view a project in 360°/VR
You must be excited to watch and experience a VR project either from your own project or from the VRTY Case Study page. However, before you begin, here’s a quick summary of how to view a project easily so that you can achieve the best experience.
When viewing a VRTY project, you’ll need three things:
A viewing device with a Google Chrome or Apple Safari browser;
Strong internet or WIFI connection;
The unique project URL.
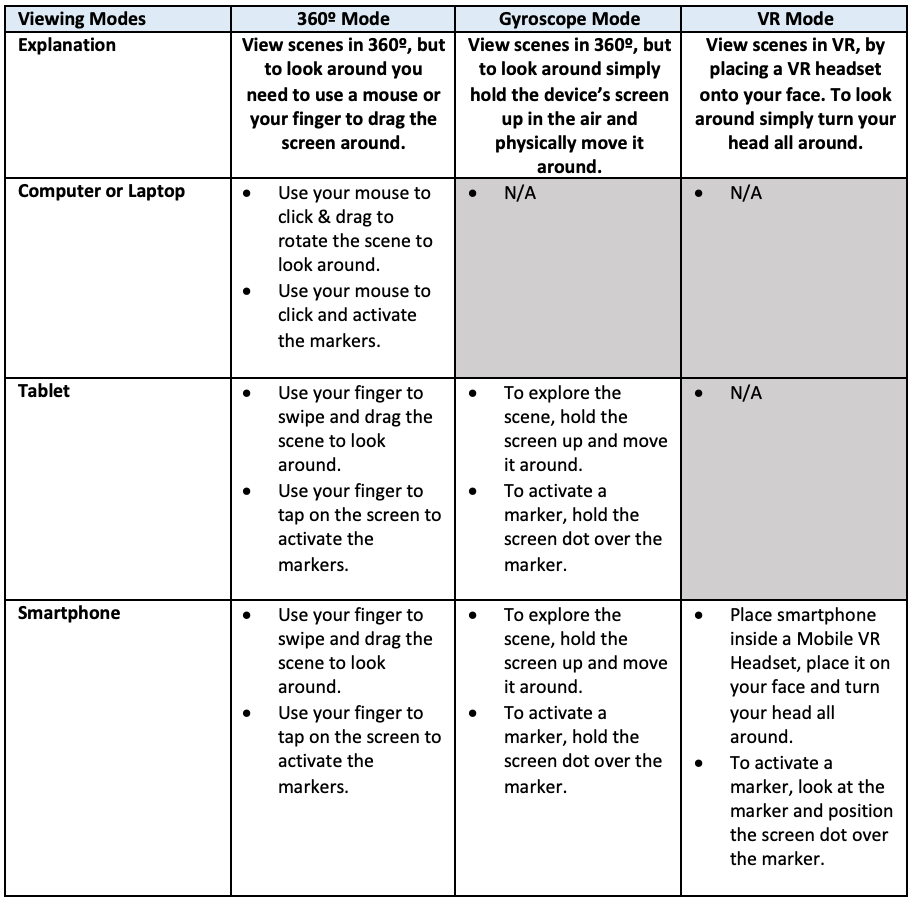
The great thing about a VRTY project is that you can view it on just about any device. Which device you choose, will also determine how you can view or experience a project. Please see the table below:
*Note: Unfortunately, you cannot view a VRTY project in an all-in-one VR headset, just yet.
Tips for viewing on a device:
Make sure your screen brightness is up high (adjust to your comfort level);
Adjust your volume levels to a comfortable level (plug-in headphones if required);
Make sure you have sufficient battery power or are plugged in;
Make sure your screen is clean (wipe and clean any dirty marks);
Make sure you have a good internet or WIFI connection;
Turn off notifications on your tablet so as not to be interrupted.
Turn off notifications, calls and auto-screen lock on your smartphone so as not to be interrupted.
Using your unique project URL:
Once you have chosen your viewing mode and device, add the URL into a Google Chrome or Apple Safari internet browser on your device (cut and paste in or use the QR code).
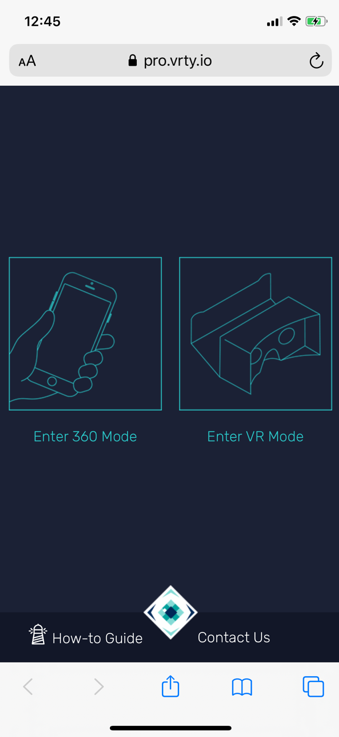
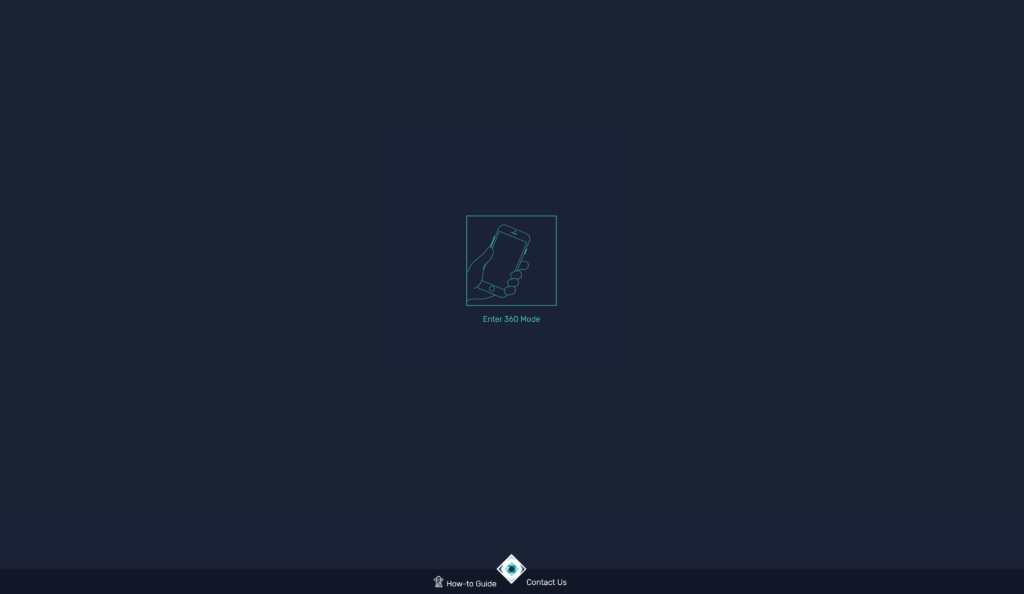
Your project will load up and give you the option to view in 360º mode or VR mode (only smartphones).
View VR project on a mobile device
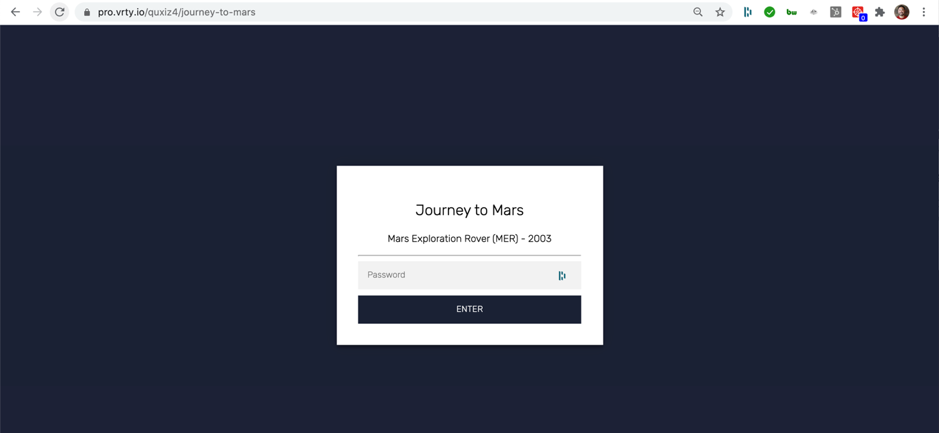
If you have placed a PASSWORD PROTECTED action on your project, then the following screen will appear and your viewer will need to enter in the correct password to access your project.
Once a viewer has successfully loaded a project, the project title will appear, then the first scene will load. Viewers can explore the project as they choose.
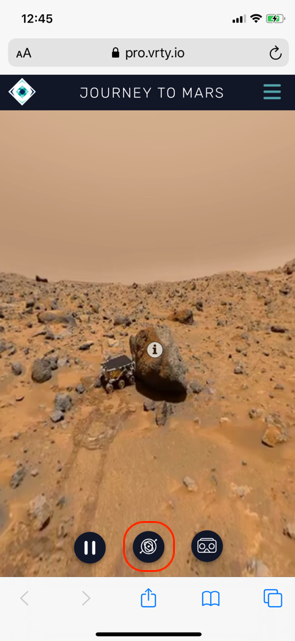
If you are viewing on mobile or tablet and want to access the Gyroscope mode, then click on the icon in the middle bottom of the screen.
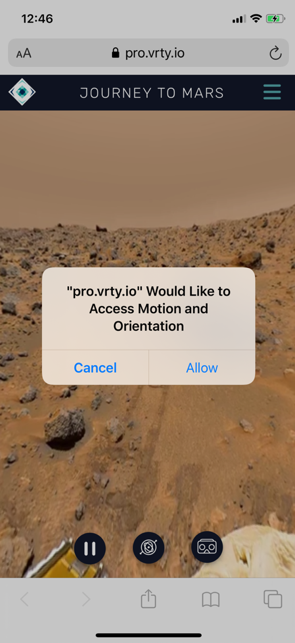
Note for Apple users, a request will pop up to allow access to Motion and Orientation – Click Allow.
Note for Apple users, a request will pop up to allow access to Motion and Orientation – Click Allow.
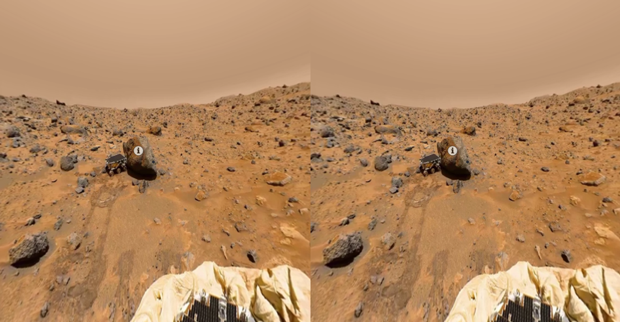
If you want to view in VR mode and on a smartphone device, then click on the bottom icon on the right that looks like a headset. You will be instructed to insert your mobile into a VR headset. Your screen will change and split into two images (a left and a right image).
You are now in VR mode.
Screenshot of VR mode
Free Icons for Content Markers
Thanks for clicking on this learning topic. Unfortunately, we are still adding this content. Please check back again later. In the meantime, you may want to check out these sites:
If you have any questions or need urgent assistance, please send us an email or contact us directly.
Thanks,
VRTY Team
GIF Making Software
Thanks for clicking on this learning topic. Unfortunately, we are still adding this content. Please check back again later. In the meantime, here are some reference websites that you may want to check out.
If you have any questions or need urgent assistance, please send us an email or contact us directly.
Thanks,
VRTY Team
Audio Recording & Editing Software
Thanks for clicking on this learning topic. Unfortunately, we are still adding this content. Please check back again later.
If you have any questions or need urgent assistance, please send us an email or contact us directly.
Thanks,
VRTY Team
Image Compression Software
We recommend you to capture 360º content in a higher quality for a better 360º/VR experience. However, due to its large file size and depending on your internet speed, the upload duration onto the VRTY platform may vary and take a longer time. To shorten the uploading time, we recommend you to compress your images with third-party software.
1. PIXLR
After editing your image on PIXLR Express or PIXLR Editor. The software automatically compresses your image when you click ‘save’.
If you did not use PIXLR Editor to edit your images. You can still upload them onto PIXLR and just save it.
2. Photoshop
Click ‘Files’.
Click ‘Save As’.
Click ‘Save for Web’.
Click ‘Save’. Photoshop
3. Compress JPEG is an online web-based application. The website application is very simple and straightforward to use.
To start:
Open Compress JPEG.
Drag and drop your image(s) that you want to compress them.
The application will automatically compress the uploaded images for you.
Now you can download them all onto your desktop.
What is VRTY?
What is VRTY?
VRTY (pronounced ‘ver-tee’) is a virtual reality & 360º software platform. VRTY is web-based meaning it lives online in the cloud. You don’t need to download or install any additional software to use VRTY.
What can VRTY do?
The VRTY platform can help anyone create, build, share and experience their own Virtual Reality or interactive 360º experiences.
Why VRTY?
We are a content creation platform, not just a platform for content viewing;
We stream VR content via the internet;
Our projects can be viewed in 360° and VR mode, with either image or video content;
We are scalable, affordable and measurable;
We partnered with content creators;
No need to download any app and no need to buy any expensive equipment;
We provide a Learning Library which is a central repository of projects created by many different people and organisations. This creates a global community dedicated to the improvement of VR content;
We can bring STEAM and Ed-Tech learning to life through engaging, immersive, and active experiences;
We can support differentiated, multi-sensory, multi-modal and interactive experiences;
We engage in professional learning in a way that combines ICT with other learning areas;
We help to create content that can be used across Australia and shared with the rest of the world.
VRTY CoLab Feature Allowing Group Viewing
One of the many requests from our creators is for viewers to be in the same VR/360º project experiencing it at the same time. After the team worked on it over the past few months, we’re glad to launch this very feature.
Called the VRTY CoLab, creators of projects can now lead a group of viewers through their experience altogether.
Setting up the VRTY CoLab feature
At the Publish Stage of your project, you will see the CoLab Channel below the project link.
Make sure that you publish your project to be public; we will add the password feature in future.
To activate the CoLab feature, click on the create new channel.
You will get two links, one is for the leader and the other is for the viewers.
As the leader of the viewing session, you’ll need to use the specific Collaborate project URL. For your invited group viewer, they will need to use the Viewing Only project URL.
To delete this session, hover over the right space and click on the ‘x’.
Guide Marker
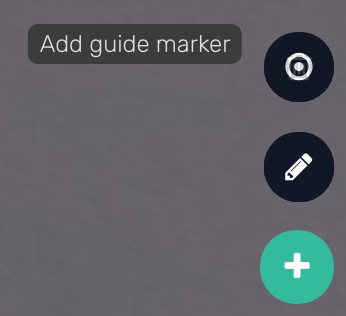
Spot the ‘+’ tools menu at the bottom right-hand corner of the VR project. This menu contains the tools to place guide markers and annotate your scene. The guide marker is for the leader to instruct your viewers to look in the same direction whilst everyone is in a scene. In addition, it also helps the leader to guide the viewers to a specific point of interest within the scene.
To Place A Guide Marker
Click on the ‘Add guide marker’ from the tools menu.
Click on the scene where you would like the Guide Marker to be placed.
Deleting The Guide Marker
Click on the ‘Add guide marker’ from the tools menu.
Then click on the ‘Bin’ icon to delete the Guide Marker.
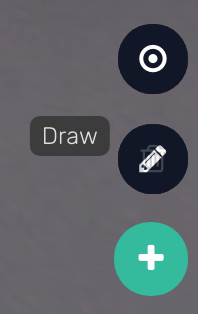
Annotating Within The Scene
Locate the ‘+’ tools menu at the bottom right-hand corner of your project. This menu contains the tools to place guide markers and to annotate your scene. The draw feature allows the leader to communicate with viewers by drawing on the screen whilst inside a scene.
Adding Annotation
Click on ‘Draw’ from the tools menu.
Press on the left-click of the mouse, hold and drag across the scene where you would like to highlight information or draw.
To Delete Drawings
Click on the drawing that you want to delete.
Click on the ‘eraser’ icon that appears next to the ‘Add guide marker’ icon to delete that specific drawing.
An alternative is to click on the ‘bin’ icon next to the ‘Add guide marker’ icon and confirm it to clear all the drawings.
Verbal Communications For Viewers In Different Locations
At this stage, we do not have a voice-over-internet capability within VRTY. If you would like to speak with your audience whilst inside your project, we would suggest using Microsoft Teams, Zoom, Google Meet or similar platforms.
How to Film with a 360º Camera
Thanks for clicking on this learning topic. Unfortunately, we are still adding this content. Please check back again later.
If you have any questions or need urgent assistance, please send us an email or contact us directly.
Thanks,
VRTY Team
Creating or Updating a Project
Creating a New Project
We recently introduced VRTY1.5 as a new update. The biggest change in the creation process is that we simplified the process to 3 steps.
To create a project, go into your projects and you can create a new project from there. The next step is to fill in your project details which will appear as a pop-up box. Fill in your project details is just as easy as before.
When creating a new project, fill in the project’s details.
Project Name*
Add a Description
Project Logo (jpeg, png, etc.)
You can return to this page to update or change these details at any time.
At the bottom left of the project page, a Show intro scene button is available. Show intro scene means that a title screen will display the project’s information at the beginning of the VR/interactive 360° experience. You can choose to disable the intro scene, simply turn off the ‘show intro scene’ button and your project will begin with the entry scene that you’d set in the storyboard.
Click Create/Update on the bottom right-hand corner to save your changes.
Before we begin the exciting journey of creating a VR/Interactive 360º project, here is some information about how we see storyboarding and creating scenes.
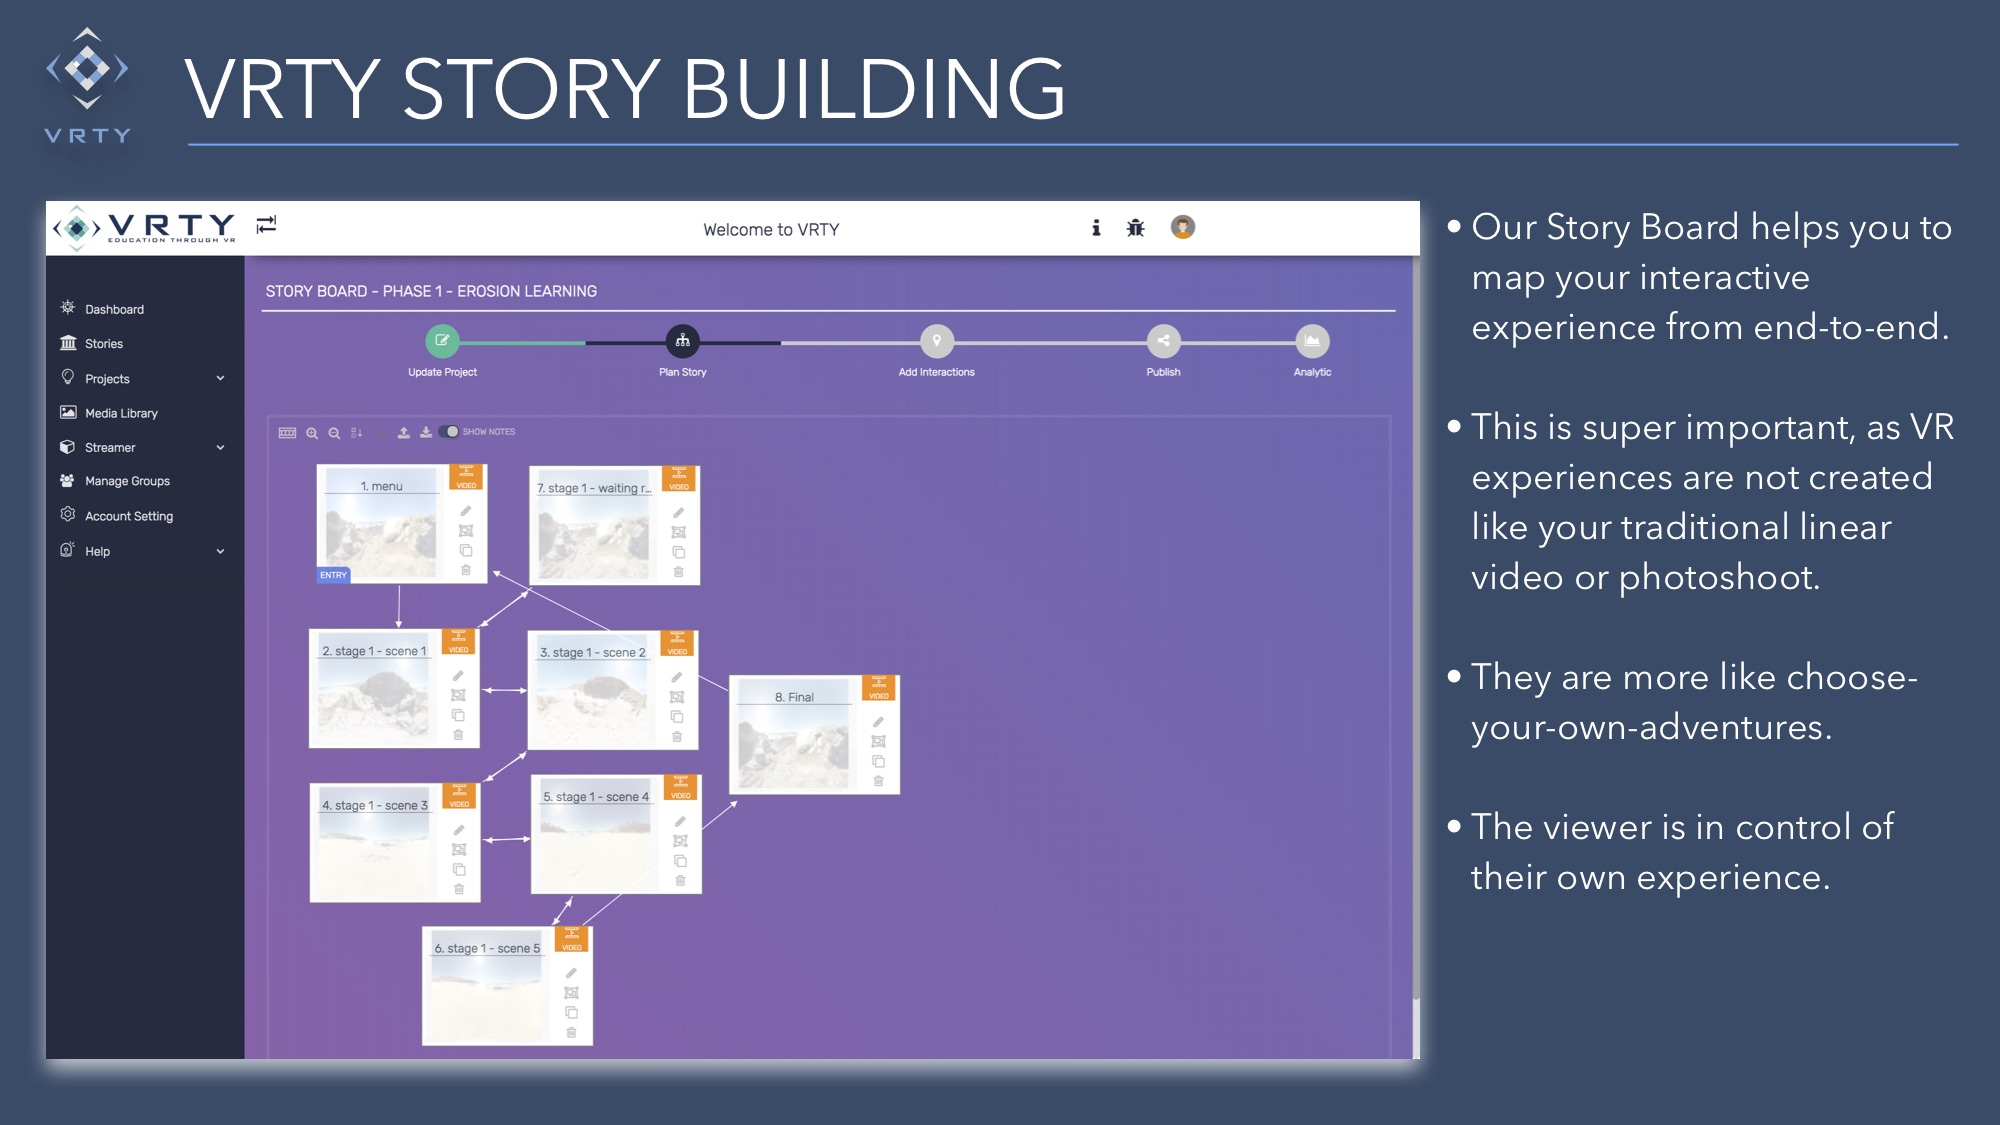
Storyboard: This empty space is in your control to create and map out the flow of your storyboard for your VR/Interactive 360º story (i.e.: see the image above).
Scene: A scene represent a 360º image or video. Think of them as rooms in a house that you can visit and walk through. In the storyboard, it refers to a box that only holds one 360º image or video. For example: if you want your VR/Interactive 360º project to have three scenes, your storyboard will have three boxes.
Create A StoryBoard
The power is in your hand! You can create fun and engaging VR/interactive 360º stories on the VRTY platform.
Creating a storyboard is simple. Here are the steps:
Double click on the screen / click on [create a new scene] icon that is on the top left menu bar.
Click and drag your scene around to organise the flow of the storyboard.
Connect your scenes to create different journeys and to manage your story flow. The connecting arrows link the current scene to the target scene. (Watch the video below on how to link scenes together).
Once the connecting arrows are created, it will automatically create a portal marker in the selected scenes. This means viewers will be able to teleport between these two scenes.
Double click on the scene nodes / click on the icon to edit scene details:
Name: Name of scene (shown in analytics).
Scene Media: Upload a 360º photo/video (also known as an equirectangular image/video) from your local folder or choose from the media library
Notes: Information about the scene (This is the creators’ notes, no one will be able to see it except for the creator).
There are a few options under [Scene Completed] (what would like your 360º photo/video to do after it finishes playing) to choose:
Do Nothing: The scene video will stop after playing.
Replay Scene: The scene will play in a loop.
Teleport to Scene: After the scene ends, it automatically teleports the viewer to the next selected scene.
One core feature in the VRTY platform is the interactive markers. These markers will make your VR/interactive 360° project more engaging and fun experience simultaneously providing educational information. Markers are like buttons where you can click/trigger it in the scene to unveil educational information, audio, images or video. In the ‘Manage Interaction’ page, you can create all kinds of markers and position them anywhere in the scene.
With our latest update on the VRTY platform, introducing a new marker, the Content Marker. The Content Marker is the merge of the info marker and the sound marker. You can create and combine all types of content at once.
Info Marker
Info marker can display information in text, GIF, image or vide, also it can display a combination of text and any media.
When user click/ trigger it, a pop-up box will appear and display the uploaded content.
NOTE:
Click on the [] to preview the changes you made. You must click on ‘publish’ to update the changes of your project.
Learn some Markers’ Features to create an interactive VR/360° project!
Enhancing Interactive Markers
If you would like to make markers move and make them interactive, here are a few ways to enhance your markers while creating your VR/interactive 360° project.
Changing Your Marker Appearance
You can adjust the size, opacity and rotate the marker to make it look like it is part of the scene.
You can set a marker to appear and disappear at a specific time. This feature encourages viewers to explore throughout the VR / 360° project.
Decide the duration of each marker to appear and disappear by using the scene timeline.
Creating a Moving Marker
You can easily make a marker move across the scene. Moving markers encourage viewers to turn around and explore, making the experience more engaging.
Record the movement of a marker while dragging it from one position to another using the scene timeline.
The marker will automatically move when the scene is playing.
Creating a Child Marker
A child marker is a marker that only appears after the parent marker has been triggered. This feature is a useful way to ensure your viewers explore all of the markers.
After creating a marker, you can edit and change your marker content anytime you want.
Editing Marker Content
At the marker menu on the left side of the page, click on the [Edit Marker Info] icon.
A pop up box of the marker content will appear and you can make any changes.
Remember to click or to apply the changes you have just made.
Editing Marker Position
Click on the [Edit Marker Position] icon of the marker you want to make changes to. You can also double click on the marker in the scene to edit its position.
The position editor will pop up and you can reposition the marker as you wish.
Remember to click or to apply the changes you have just made.
Tips & Trick
Double click on the your chosen marker in the scene to edit your markers’ position.
Click on the marker icon on the marker menu helps you locate your marker in the scene.
VRTY allows creators to add images, videos and GIFs into your VR/interactive 360° projects with the content marker. Before we begin on the steps to add these media types into your VR/interactive 360° scene, make sure you have your media file prepared in a location that is easily accessible for you (e.g. USB, hard drive etc.).
Uploading an Image or Video into Content Marker
Create or open an existing project, and open the chosen scene. Move the scene (click and drag) to the position where you would like to add the info marker.
In the create tool bar, click the “Content marker” icon.
Give the marker a name which clearly represents the content of the marker.
Choose a marker icon. Click on the media icon and choose an icon image you like or upload them by dragging and dropping.
Follow the instructions to upload your image, video or GIF.
NOTE: If the image, video/GIF has been previously uploaded to the Media Library, click the icon to locate the media content.
You can type or copy and paste in any text you want. The text will appear below the uploaded media content.
Alternatively, you can embed third party site videos using the <> source code feature in the text box.
Click .
Click in the 360° scene to place the content marker.
If you did not place the marker beforehand, search for the marker in the timeline and click the “Place Marker” icon. Then, click on the 360° scene to place the marker.
Next, you can adjust the size, opacity and rotate the axis of the marker.
VRTY allows adding audio into VR/interactive 360º projects. Before we begin, make sure you have an audio file prepared in a location that is easily accessible for you (e.g. USB, hard drive, desktop) OR have a script ready to use for the Text-to-Speech feature in VRTY.
Uploading or Generating Audio into a Content Marker
Create or open an existing project, and go to your chosen scene. Move the scene (click and drag) to the position where you would like to add the sound marker.
In the create tool bar, click on the Content Marker icon.
Give the marker a name which clearly represents the content of the marker.
Choose a marker icon. Click on the media icon and choose an icon image or you can upload your own icon by dragging and dropping the file into the box.
There are three methods to put audio into the Content Marker which are the Upload an Audio File, Text-to-Speech and Recording Voice.
Audio File
If you have pre-recorded audio file (music, voice recording, etc.)
Select ‘Upload Audio’ tab.
Drag and drop the audio file into the box from your computer to upload it into a sound marker.
OR
Click on the ‘Choose File’ icon to upload your audio file from your desktop.
OR
Click on the icon in the top right side of the box to upload your audio file from the VRTY media library.
Then click or to create/update your sound marker.
Text-to-Speech
This feature generates a human-like voiceover which reads aloud the words you type into the dialogue box.
Click on ‘Text-to-Speech’ tab to choose this function.
Select a language and a voice style from the dropdown menu (e.g. male or female with Australian, British or American accent).
Type in the text for your voiceover into the text box provided. Make note of your character limit.
Click ‘Generate Audio’.
Then click the play button to listen the preview of the voiceover.
You can make any adjustment if required. Remember to click ‘Generate Audio’ after making any changes.
Once you are happy with the voiceover audio, click to create/update your sound marker.
Recording Voice
The VRTY platform just released a new feature where the creator can record their own voices using our own voice recorder. This will come in handy for those who wants to learn languages, they can practice it by recording it straight on the platform.

 Click on the pencil icon .